Wednesday night saw another of our Operation Sea Lion mega games. This time it was mine and Dave's Germans vs. Adam's Canadians and Mazz's Soviets. We'd decided to go for 2,500 pts a side and the battle took place in Worcester. This report will be a bit more vague than usual as with four people playing I didn't always catch what went on in the other half of the table.
I took the following:
Feldherrnhalle Armoured Company - Reluctant Trained
FHH Panzerkompanie HQ - 2 Panthers
FHH Panther Platoon - 3 Panthers
FHH Panther Platoon - 3 Panthers
Volksgrenadier Platoon - 2 Assault Squads and 1 MG Squad
FHH Anti-aircraft Gun Platoon - 2 Mobelwagons
While Dave had
Panzerspahkompanie - Confident Veteran
HQ - 1 Puma
A/C Platoon - 3 Pumas
A/C Platoon - 3 Pumas
A/C Platoon - 3 Pumas
Schwere Panzer Plt - 3 Tigers
AA Plt - 2 Sd Kfz 7/2?
The Allies had Adam's
12th Manitoba Dragoons - Confident Trained
Armoured Car Squadron HQ - 2 x Staghound I & 2 x Staghound III
Armoured Car Platoon - 3 x Staghound I
Armoured Car Platoon - 3 x Staghound I
Armoured Platoon - 3 x Sherman V & 1 x Firefly VC
Anti-tank Platoon (SP), Royal Canadian Artillery - 4 x M10C 17 pdr
Field Battery (SP), Royal Canadian Artillery - 4 x Sexton
I'm not entirely sure what Mazz had I think it was as follows:
Strelkovy Batalon (Red Army) - Confident Trained
Strelkovy Company (Red Army) - 3 Plts
Strelkovy Company (Red Army) - 3 Plts
Tankovy Company - 5 x T-34's
Tank Destruction Company (Red Army) - 4 x 85mm obr 1939 gun
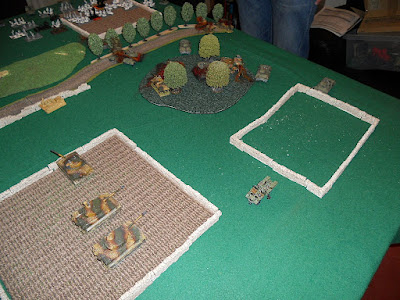
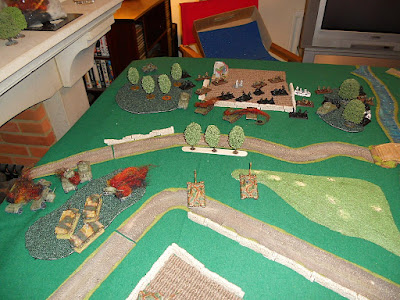
We decided on Fair Fight for the mission and the initial set ups can be seen in the pictures below.
 |
| Our lef flank with their objective by the field wall |
 |
| The centre |
 |
| Our right flank with their objective between the walls |
 |
| Their left flank and our objective |
 |
| The centre from their side of the table |
 |
| Their right flank with our second objective |
As we were the attackers Dave used our recon moves to get his Pumas forward to get into good firing positions. But we lost the roll and the Allies got to move first. This proved disastrous for us as Adam's M10's moved forward and blew apart our right flank Puma's. Elsewhere the Soviet infantry and guns stayed put while the armour and a/c's moved forward and shot but did no damage.
We kept stationary on the left flank to maximise our shooting but only managed to knock out one of the T-34's. In the centre the Volksgrenadiers advanced on the village while the Mobelwagons headed over to support the right flank. The Tigers and Panthers took up firing positions on our right but did no damage.
 |
| Our left flank at the end of turn 1 |
 |
| The centre at the end of turn 1 |
 |
| Our right flank at the end of turn 1 |
Turn 2 saw the Staghounds try to turn our left flank backed up by some Shermans while the M10's advanced on the Panthers on our right flank. In the shooting phase the M10's knock out one of the Panthers and bailed another but the Staghounds & Shermans on our left fail to damage the Pumas. In the centre combined fire from artillery and Staghounds knocks out two Pumas forcing a morale check which they fail.
On our left flank the Pumas shoot back at the Staghounds and five hits see all three Staghounds destroyed. While the left flank Panthers knock out two more T-34's forcing a morale check which they fail. In the centre the Mobelwagons manage to knock out a Staghound while the Tigers knock out two more destroying the platoon.
 |
| Our left flank at the end of turn 2 |
Turn three sees the Shermans fire on the Pumas but to no effect. In the centre the Mobelwagons pay for their attack on the Staghounds by attracting enough fire to knock out one and bail the other. While the M10's knock out another Panther causing a morale check which they fail.
Our fire is largely ineffective this turn but the Volksgrenadiers in the village managed to knock out one of the Soviet ATG's.
 |
| The centre at the end of turn 3 |
 |
| Our right at the end of turn 3 |
Turn four sees the Shermans trying and failing to knock out the Pumas but the Firefly does manage to knock out one of the Panthers with a long range shot. The M10's now move round the wood on our right to start to threaten the objective.
The Pumas continue to do well and knock out one of the Shermans. In the centre fire from the Volksgrenadiers knocks out another ATG.
 |
| Our left at the end of turn 4 |
 |
| The centre at the end of turn 4 |
 |
| Our left at the end of turn 4 |
Turn five sees the Shermans continue to try and knock out the Pumas and again fail. But the Allied artillery does bail one of the Panthers. In the centre more Staghounds move forward and knock out the last Mobelwagon. While the M10's continue their advance on the objective and manage to knock out a Tiger with their shooting.
The Pumas are again successful with their shooting and knock out another Sherman forcing a morale check which they fail. The Panther remounts and they all move forward to avoid the artillery. In the centre fire from the CiC's Panther and the Volksgrenadiers knocks out the last two ATG's and they also knock out a Staghound with a Panzerfaust round.
 |
| The left at the end of turn 5 |
 |
| The centre at the end of turn 5 |
 |
| The right at the end of turn 5 |
Turn six sees the Allies only having the infantry left on their right flank so they decide to advance their left flank infantry to contest the village. While fire from the M10's on the Tigers is ineffective.
The Panthers advance and proceed to whittle down the Russian infantry with Mg fire killing two stands. In the centre the Volksgrenadiers open up on the advancing soviets but only kill two stands. Fire from the Tigers only bails two of the M10's, they just can't finish them off despite their poor armour.
 |
| Our left flank at the end of turn 6 |
 |
| The centre at the end of turn 6 |
 |
| Our left flank at the end of turn 6 |
Turn seven sees a successful assault on the village by the massed soviet infantry which forces a morale check which they fail. I also have to now make a company morale check which I also fail losing us the game.
So a win for the Allies 4-3. It was a fun and bloody game that could have gone either way. The M10's led a charmed life but it was the masses of Soviet infantry that just overwhelmed us in the end. We couldn't pour enough fire onto them to cause ten hits and pin them.
No comments:
Post a Comment