Showing posts with label batrep. Show all posts

Sunday, 13 December 2015

Iron Cross WW2 rules first playthrough

As promised here's my thoughts on the rules after my first solo play through. I set up a 4'x4' table as shown below, the hedges I used as bocage. (Sorry about the poor quality of the pictures I couldn't find the lead to charge my camera.)

A crossroads somewhere in Normandy

I grabbed what 15mm figures I could find and made two 500pt forces. The Americans (shown below) had 3 Sherman 76mm, 2 M10 tank destroyers, an M20 scout car, a mortar, an MMG and 6 infantry units 3 of which had bazookas.

The U.S. forces

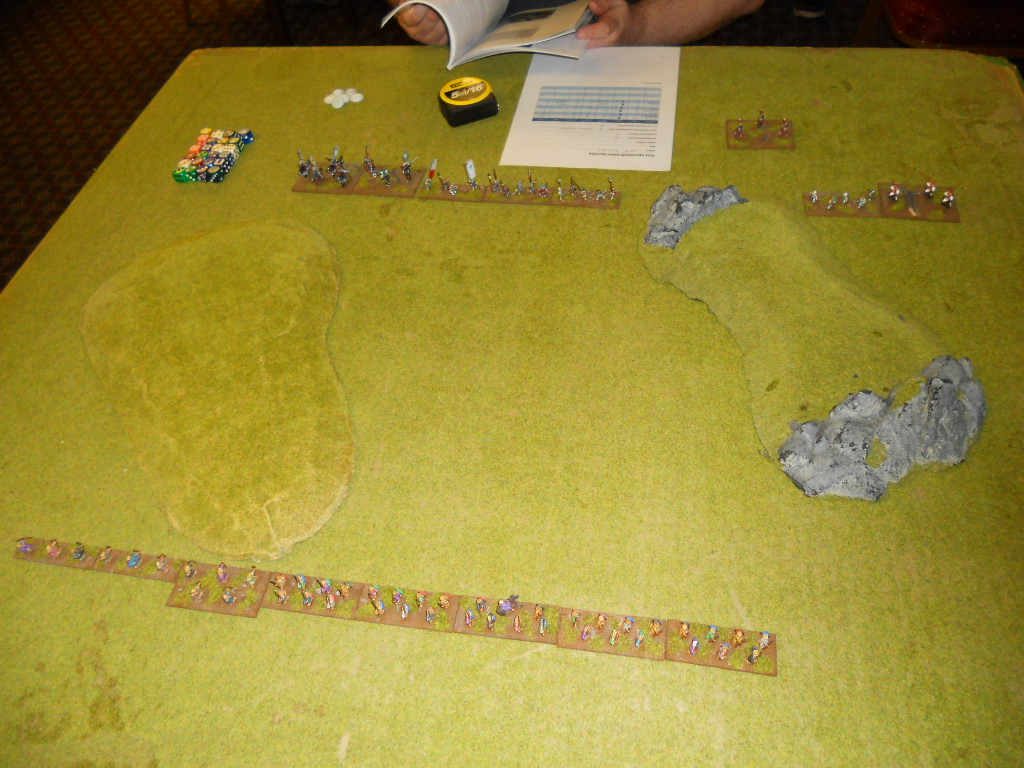
The Germans (below) had 2 Panthers, a Pz IV, a Stug IV, 2 Pak 40s, a nebelwerfer used as a mortar and 4 infantry squads.

The German force

I'm not going to do a full AAR as that wasn't the point of the exercise. My aim was to try out the rules and see what happened.

I didn't use any of the supplied scenarios but set up was straightforward. The game uses activation tokens as its main resource, activating a unit to move or react to an enemy move costs you one token. You start the game with one token for each unit plus one extra from your command unit. In this game the US had 15 tokens while the Germans had 12 tokens. I was a bit worried that this activating and reactivating wouldn't work too well solo but I was wrong. The US won the initiative and after I'd activated a few units I was starting to look at how many tokens I had left and how many the Germans still had and decided to pass the initiative over to the Germans while I had enough tokens left to react if needed. Also this allowed the US to see what the Germans were going to do and maybe adjust their plan accordingly when they got the initiative back. This planning your tactics and deciding when to react and when to pass the initiative over is the main part of the game and is great fun even solo.

In the Meeples & Miniatures podcast the authors commented that taking a force just comprised of a few Tigers or Panthers although it seems powerful is a bad idea. I wasn't so sure about this and nearly took five Panthers (100pts each) as the German force. However after a few activations I understood what they meant. Obviously as you activate and reactivate models you have fewer & fewer tokens left. The US with 15 tokens could do a lot of things but if I'd taken all Panthers I'd only have had 6 tokens to start with and would soon run out meaning the US could activate without fear as the Germans would be unable to react allowing the tank destroyers or Shermans to push forward and go for shots on the flank/rear unopposed. But that's not the only reason. If you have enemy infantry within 12" you're penalised when firing (maybe because your commander is buttoned up reducing visibility), unless you have your own infantry within 12" as well. So you need infantry support for your tanks which I thought was a nice touch.

I'd didn't find the lack of artillery a problem as I had mortars for indirect fire. Also one of the scenarios allows a preliminary bombardment which inflicts morale markers to weaken the enemy before your attack. I didn't miss air support either, obviously the airfields were shrouded in fog or the planes were tasked elsewhere. I didn't use smoke as I never really felt the need for it as I had plenty of cover on the table.

(What follows is mainly what I felt was wrong with the rules. This doesn't mean I don't like the rules or that they're bad. Quite the opposite I think they're excellent but with some problems that should have come up in play testing and been fixed. It looks like when they were streamlining the rules they went a little too far in places. None of the problems I encountered were game breaking or even difficult to fix. But may cause problems for inexperienced gamers.)

I did start to hit problems as the game progressed. The first was with line of sight. There is no mention of how you deal with LoS anywhere in the rules. Now in most cases this isn't a problem as you can reasonably say that units behind buildings or bocage are obviously out of sight. But then we get to woods, do they allow clear LoS as you can see through them on the table or do they block LoS completely. If you have a unit in a wood can it shoot out and be shot at in return? None of these things are that difficult for a pair of friends who are experienced gamers to agree on before the game. But these rules with their simplified approach while still having good tactical depth would be an excellent starter set for new players and I think they would struggle to know what to do. This isn't a big fix, a few lines could quickly clear this up and I'm surprised it hasn't been included.

My next problem follows on from this and relates to buildings. There are no rules for buildings in the game. A few activations in I wanted a few units of infantry to enter the church but I couldn't find how you do this. After a bit of thought I decided that taking an action to enter a building (units have two actions they can use each activation) would be reasonable. After the game as I was checking a few things in the rulebook I noticed that buildings were mentioned in the movement section as being counted as rough going, that is the same as a hedge or area of rubble.
Looking at how rough ground affects movement I saw that it has no effect on infantry. Fair enough the game is a bit abstracted in certain areas and I can live with that. Except looking at how rough ground affects vehicles the rule doesn't work. For example scout cars can pass through rough ground if they roll a 2 or better on a D6. I'm sorry there's no way a little scout car can enter one side of a terraced house and easily pass out the other side. An intact house is very different from a hedge or area of rubble. Again this is a reasonably easy fix and one wonders why it wasn't picked up in playtesting.

But that's not the only problem with buildings and here we go back to the lack of LoS rules. Lets say my US infantry enter the rear of the church and I have a Pz IV in the field on the other side of the church. Can the Pz IV react to the infantry moving into the church and shoot them, does it see them? Yet again this is an easy fix and I can't see how this didn't come up in playtesting.

The last problem I have with the rules is how certain things are explained. I'll give you a couple of examples.

One of the rules for mortars says that you get a +1 bonus to hit as long as some part of the target hasn't moved more than 4" from where it was first targeted. This seems straightforward, it's 8+ to hit the first time and as long as part of the target is within 4" of it's original position the next time that turn you shoot at it it's a 7+ and then a 6+ etc. Except the rule goes on to explain this by saying "This means that a player cannot activate the target unit, shuffle sideways 5" and then claim its not in the target area." Now I'm not very good at maths but I think that 5" is more than 4" so it is outside the target area. This could be a typo but it might not be, it might mean something else that I'm missing.

Another example is with Reactivation. The rule says the reacting player has to say what his reaction is and pay the token cost 'before any dice have been rolled'. So what happens if the first player then fails his activation, does the reacting player still lose his token for reacting even though he has nothing now to react to. I decided that if the player fails his roll the activation didn't happen so there is nothing to react too. This maybe what was intended I have no idea.

There's other areas where things aren't as clear as they could be but these rules aren't alone in that respect.

The only other thing I would say is that these are not 'fast play' rules. Both of you will spend ages each turn deciding on what to activate and whether to react or not. Especially with games where you may have 30 or 40 tokens each like at 1000pts. You could get round this by setting a time limit for each turn and using a chess clock app on your mobile.

Overall I like the rules despite the problems I mentioned. I spent most of my time during the game working out which units to activate and whether it was worth spending a token to react to a move or not. Should I risk it and try push forward multiple times with a unit and hope I made the activation rolls and not waste limited tokens or not. In other words I was thinking about tactics not rules which is the overriding strong point for these rules. I'll be using them again now I've got my 'house rules' sorted for the things I mentioned and I expect to have lots of fun doing so.

Monday, 30 September 2013

Dust Tactics AAR - Recon in Force

Having read through the rules it was time for my first game. I went with the first scenario, 'Recon in Force', as it is the introductory scenario and only uses a walker and a squad on each side. I only have one walker for each side so that choice was easy. But the choice of squads was a bit more difficult. I wanted to have some anti-mech capability but also some long range anti-infantry. After perusing the various squads I went with the three man Heavy Flak Grenadiers squad for the Germans and the five man "Death Dealers" Ranger Weapon Squad for the Americans.

"Blackhawk" Walker

"Death Dealers"

The Blackhawk's weapons only have a range of 2 squares but can do a lot of damage. The Death Dealers have MG's and an LMG that can shoot 4 squares but can't damage a mech. They also have a bazooka which shoots 3 squares and can take out a mech in one shot, if it hits.

"Hans" walker

Heavy Flak Grenadiers

The Hans has a range of 3 squares and can be deadly to both infantry and mechs. The Heavy Flak Grenadiers have a range of 4 squares and put out a large amount of fire.

So some interesting tactical challenges right off the bat. The Germans have the advantage of range but have fewer men and can engage fewer targets in each activation. The Americans have more versatility and can one shot the enemy mech but need to get in close. Lets see what happens.

I set out the map as per the scenario and randomly rolled to see where the ammo boxes and tank traps would be set up. The map is shown below. There's a building in the centre which blocks LoS. The two cross marked areas are impassable terrain and also block LoS. The boxes provide soft cover and tank traps provide hard cover, the tank traps also block LoS for infantry. Walkers can't enter squares with tank traps.


I rolled for initiative and the US won and made the Germans move first (you alternate activating units until the turn is complete). All the units have a movement allocation of 1 square per action and can do two actions a turn. The Germans moved the grenadiers forward 2 squares, looking to get them into the central building. The Blackhawk then moved two squares forward to get into position to cover each flank and the building. The Hans has a special rule, Scout, that lets it move an additional 2 squares in the first round so it moved forward 3 squares. It could have moved another square or fired by using its second action but it had no targets in LoS and I didn't want it to get too close to the enemy. I did realise that it would be in range of the Death Dealers when they came on and could be one-shotted but there was only a 1 in 6 chance of that so I thought it was worth the risk. Sure enough the Death Dealers moved on and shot at the Hans but their bazooka missed. End of turn 1.

The Death dealers line up a shot on the Hans

The board at the end of turn 1

Going first next turn could be crucial and the US won initiative again. The Death Dealers were obviously going to go first but had a decision to make. They could fire their bazooka again and then move into cover by the building or they could use both of their actions to do 'Sustained Fire' which would let them re-roll any misses. Being gung-ho Yanks they went sustained fire and missed but hit on the re-roll doing 3 damage to the Hans. As the Hans only has 3 wounds it explodes in a ball of fire to much whooping and hollering from the Yanks. The Grenadiers decide to pull back to the corner in the hope of using their longer range to pick off the Americans as they close in for the kill. The Blackhawk moves over to the left, chasing the Grenadiers.

The board at the end of turn 2

(I should point out here that the victory conditions work on points lost so as the Yanks are ahead they have no reason to chase the Germans and could play out time for the win. This is a criticism I've seen of the game that once you're behind it makes it very difficult to win. As this is a small game it's hard to see if this is true but things are definitely going to be difficult for the Grenadiers now.)

Turn 3 initiative goes to the Germans and they see a chance to even things up. The Blackhawk is in range of their Fliegerfausts (think 6 barrelled rocket launcher) which have the special rule burst which lets them roll double the amount of dice if their target hasn't moved this turn. As the Blackhawk hasn't moved yet they get to roll 12 dice instead of 6 (I should note here that you always need a six to hit). Each hit will do one wound so they need three hits to knockout the Blackhawk. Just to make sure they decide to use both their actions for sustained fire letting them re-roll any misses. They want that Blackhawk dead! It's just as well they did as they only got 2 hits before the re-rolls but the third hit soon appears and the Blackhawk also explodes in a ball of fire! The Death Dealers head to the building looking for revenge.

The board at the end of turn 3

Turn 4 sees initiative go to the Americans. They make the Germans go first. The Grenadiers spend one action reloading and then move towards the tank traps looking to gain some cover. The Americans with no LoS also move up towards the tank traps. End of turn 4, 4 turns left.

The board at the end of turn 4

Again initiative is going to be crucial. The Americans win it and move forward gaining hard cover from the tank trap. They use their second action to fire on the Grenadiers. The Grenadiers could try and use reactive fire but with only a one in six chance of being successful they decide against it, relying instead on their armour and their 'Damage Resilient' special rule to try and save the day. The Americans open up with everything they've got but their close combat weapons are ineffective against the German armour so have to rely on ranged attacks to get the job done. That's five dice needing sixes to hit, and they whiff no hits at all. The Grenadiers decide to stay where they are and use sustained fire so they get nine dice re-rolling misses, but the Yanks do get a save from being in heavy cover. The Grenadiers inflict a total of 5 hits after rerolls so the yanks have 5 hits to save needing anything but a six this time as they are in heavy cover. They save four of the hits but lose a man. The Grenadiers then draw their Combat Knives and get stuck into close combat where the Yanks won't get a cover save. The Grenadiers roll 3 dice and get three hits. With no cover save that's three more dead Americans! Things are swinging the German's way.

The board at the end of turn 5

Turn 6 sees the Germans win the initiative. Although their 'fausts are unloaded they decide to do a sustained fire close combat, instead of reloading, as that will ignore the cover giving them the best chance to finish off the last man. They roll 3 dice with no hits so on to the re-roll and they whiff again! The Yanks live to fight another round. They sustain fire back with three dice getting 2 hits after re-rolls but a Damage Resilient roll saves one of them meaning only one dies. Onto turn 7, only 2 turns left.

The board at the end of turn 6

The Americans win the initiative and sustained fire on the Germans with 3 dice getting two hits but the Grenadiers Damage Resilient roll saves both hits! The Grenadiers again use their knives but with only 2 dice this time and again sustain fire giving them re-rolls. They whiff the first attack but get two hits on the re-roll and the last American falls to the floor. A victory to the Germans all be it a pyrrhic one.

So what are my thoughts after this first solo game? There's a surprising amount of tactical thought required for what appears at first glance to be a simple game. The initial choice of units made the difference here with the Grenadiers heavy armour and Damage Resilient special rule proving crucial. I could have held back with the Americans though and made the Germans come to them which might have been a better move, if a little cowardly. Overall I enjoyed it and look forward to playing a game with more units. Although my long term aim is to play Dust Warfare rather than Tactics. However a quick game of Tactics might suck people into the game world and get more people interested in playing.

Saturday, 21 September 2013

Review & AAR: 'An Age of Sword & Arrow' Ancients Rules

I came across these rules via a post on Anatoli's blog. They had some interesting sounding mechanisms so I downloaded the free PDF and had a closer look. They seemed worthy of further investigation and I had a look at the supplied army lists to see what I could field. I decided to have two Norman armies fighting as these were the only forces I could fit to armies I already owned.


I will no doubt get some things wrong or miss things so take what I say in that light. The first thing that struck me was the difference in the respective points cost of the troop types. The Milites (heavy cavalry) with heavy armour cost 80pts per base while a base of close order crossbowmen only cost 12pts. So one base of Milites costs more than six bases of Crossbows, that seems like a big difference. I was interested in how this would turn out in a game. I got out my 15mm Italian Wars army to represent the Normans and proceeded to spilt it up into two forces with nearly equal points. The game does not recommend any particular points total for games so I just went with what I could field. Which was as follows:

Army A
1 x General, Leadership 3, Strategy 1 - 100pts
12 x Milites, Heavy Armour, Lance, Stirrups - 960pts
4 x Light Infantry, Skirmishers, Insignificant, Bow - 52pts
Total 1112pts


Army B
1x General, Leadership 3, Strategy 1 - 100pts
6 x Milites, Heavy Armour, Lance, Stirrups - 480pts
6 x Auxiliary Cavalry, Medium Armour, Javelin, Spear, Stirrups - 282pts
12 x Archers, Crossbow - 144pts
8 x Light Infantry, Skirmishers, Insignificant, Bow - 104pts
Total 1110pts


So two very different forces from the same army list. With the armies sorted I set up a battlefield with a small wood on each flank. I was just looking for a simple battle to try out the mechanisms so there was no need for anything more complicated.


Set up was a bit puzzling. There's no indication of how far in you can set up or how to lay out terrain. So I just put them where it felt right. Unit sizes are a bit strange too, the Milites and Aux Cavalry have to be 3 or 4 bases, the skirmishers 2-3 bases but spear armed infantry can be 3-8 bases. Army A I set out as in the above photo. Army B I had to think about for a bit. In the end I decided to have the skirmishers and Aux Cav out in front to harass the Milites in the hope that their fresher Milites would have the advantage especially if the crossbows could do some damage as well. As can be seen below.


So with that done it was time to start the game. Again there's no indication of how to choose who goes first so I just rolled a die (I should note here that this is a D10 game) Army B won and went first. The turn sequence is Rally, Movement, Shooting, Assault, Combat. As this was the first turn there was nothing to do in the Rally phase so I moved on to the Movement phase. I should note here that each phase has a number of sub-phases that break down what you can/have to do in each phase.

I moved the skirmishers forward to shoot at the Milites and moved the Aux Cav up to be in a position to harass the Milites next turn. Infantry can move 6" or run for 10" Cavalry can move 10" or run 16" (there is a typo in the rules with two different March move distances for cavalry, I went with 10" as it seemed right) but running adds a point of Fatigue which hinders a unit (more on this later).

Position after the first move

Next up was shooting. All the skirmishers were in range and had LoS so no problems there. I fired 2 bases at each of the flank Milites units and 4 at the center unit. The skirmishers have a skill of 6 but moved so suffer a -1 meaning they need 5 or less on a D10 to hit. They are armed with bows which have a rate of fire of 2 meaning that each stand gets to roll 2 D10. Some abysmal die rolling meant that only 2 hits were scored from 16 dice! Both of these were on the center unit which now has to try and save.
All units have a base 'save' of 5 modified by things like armour. The Milites have heavy armour which gives them a +2 to save making it a 7, ranged attacks also add a +1 making it an 8. So they now have to roll 8 or less on 2 dice or 2 bases will be removed. The poor dice rolling continues and a 10 means a base is removed from the center unit.
That completes the shooting for Army B so now Army A gets to shoot. All shooting is deemed to be simultaneous so any bases removed this phase would still get to shoot back. As the Milites don't have ranged weapons this doesn't apply. Army A's skirmishers are out of range so the shooting phase ends.

Ammunition is a factor in this game with the skirmishers having 3 Ammunition. This is now reduced to 2 as they fired. Ammunition can be replenished by 2 if the unit spends a turn 'Resting', this also removes 2 'Fatigue' if any has been accrued.

The next phase is 'Assault'. If you didn't run or shoot and you have an enemy in range you can assault. So this means its possible for a unit can move twice in a turn. For example a mounted unit can march 10" in the movement phase and then charge 6" in the assault phase. The next bit is a bit different as there are two types of assault, Charging and Harassment. Charging is what it sounds like but if the unit has the Harassment skill they can remain stationary and harass the enemy (presumably with whatever ranged weapons they have). Carrying out an harassment assault does give the unit 1 Fatigue though but it inflicts Fatigue equal to the Harassment skill on the target unit. As Army B had no one in assault range the phase ended as did their turn.

There was nothing for Army A to do in the Rally phase so onto the movement phase. I moved everything forward a normal move. I thought about Running the skirmishers deeper into the woods but decided against it.


So on to the Shooting phase. I shot 1 base from each of the skirmisher units at the Aux Cav needing 5's to hit and got 2 hits. The Aux Cav have the standard save of 5, +1 for medium armour, +1 for a ranged attack giving a save of 7. Both hits were saved. Army B now gets to shoot back.
This is where things got complicated. The skirmishers shooting is the same as last time, except they haven't moved. But Army B's Crossbowmen are also now in range. As far as I can tell you are allowed to shoot over intervening units as long as the target is in range and arc of fire. The rules just say that if there is no LoS the target is harder to hit. I think this is just wrong. It might be ok for bows that could arc over intervening troops but crossbows and gunpowder weapons have flat trajectories which would mean hitting the intervening unit. Plus the penalty is only a -1 to hit. So on with the expected carnage. The skirmishers kill 4 stands of the Milites, the Crossbowmen only have a RoF of 1 but they have AP2 nullifying the Milites +2 from their heavy armour and kill 3 more stands. That's now 8 stands gone from the original 12. I called the game at this point as there was no point continuing.


I may have done something wrong here but I can't see what it could be. There's a lot to like about these rules including a ton of stuff I didn't get to mention. The Harassment/Fatigue mechanism looks great. You can spend points to give your General some flavour like in the Total War series with attributes like 'Butcher' for 75pts which makes enemy units suffer -1 morale. There are special moves like 'Feigned Withdrawal' and special attributes for your units. But I'm not convinced about the points values or some of the basic mechanics. It has a nice 'Hobby' section for beginners but doesn't have an index or QRS (which it really needs). There's also nothing about ranks, for example it doesn't seem like you get any benefit for having any ranks beyond the first for close combat figures, so no point to pike blocks. Also information on things like combat is spread over a number of sections meaning you have to flick back through various pages to hunt down the information you need.

I really wanted to like these rules as they have a lot of cool features, they're worth downloading but I'm going to stick to Impetus for now.

Friday, 9 August 2013

HOTT AAR: Dwarves vs Lizardmen

Last week I decided to have a game of Hordes of the Things (HOTT). One of the things I like about games like HOTT is that they only need minimal terrain and a 2'x2' board so you can play them almost anywhere. Also you don't need many figures. The forces were as follows:

Dwarves
Hero General
2 x Behemoths
2 x Flyers
3 x Blades
1 x Shooter

Lizardmen
Hero General
2 x Magicians
3 x Riders
5 x Hordes
2 x Lurkers

The terrain comprised two woods and two areas of impassable terrain (a ruined temple and a tar pit containing a dragons skeleton). The skull and temple are aquarium features

The terrain layout
 
The Dwarves were going to defend and lined up in front of their stronghold.

The initial dispositions
The Lizardmen planned to put their Magicians between the wood and the skull while the hordes blocked the gap between the ruins and the skull with the riders and general in reserve. The Dwarves slowly moved the blades round to confront the hordes while the war mammoths raced forward to engage the magicians.
 
 
A number of turns of inconclusive combat followed as the mammoths tried and repeatedly failed to crush the magicians. Having to flee 6" when beaten by the magicians really hampered them. However the blades eventually got into contact with the hordes and started to cut them down. But the Lizardmen used spare pips when they could to bring back the hordes on their baseline.


The Lizardmen sent their riders in to slow down the blades but were easily defeated.
 

Tiring of the stalemate with the magicians the Dwarven hero general decided it was time to enter the fray


Sadly fate was not with him and a bad roll saw him ensorcelled and with their other losses that meant defeat for the dwarves.


The fateful die roll
All in all a bit of dull game with lots of to and fro but few casualties till the end. Still it scratched the itch and I'll play again but with less powerful units.

Saturday, 8 September 2012

Dux Bellorum: First Games

Following on from my first look at Dux Bellorum, which can be found here, Monday night saw my first games with the new Dux Bellorum rules. I hadn't managed to finish painting up two Dark Age forces in time so I proxied some 15mm figures I use for Impetus. This meant that I had to pick armies that would fit with the figures I had available. I went with a Late Roman army vs a Romano-British army at 27 points giving us room to use the special rules or buy extra Leadership Points (LP). The lists are shown below.

Romano-British 27pts
General with Foot Companions
Ordinary Shieldwall x 5
Bow
Mounted Skirmishers
Foot Skirmishers x 2

Late Roman 27pts
General with Mounted Companions
Noble Riders
Ordinary Riders
Ordinary Shieldwall x 3
Bow
Mounted Skirmishers

Here's a photo of the initial layout. I was the defender and selected a couple of hills as my terrain choices.


Here's a close-up of my Samurai pretending to be Late Romans.


And my Arab Conquest figures pretending to be Romano-British.


I got so caught up in playing and trying to explain the rules to Matt that I forgot to take any more photos.

The rules recommend a 32 pt game but we decided to not bother spending our spare points on the special rules to keep things simple in our first games. We also decided not to use any of the scenarios that come with the game and just had a couple of knock down drag out fights. Although some of the scenarios do look interesting.

So onto the game. First thing to say is that we both had fun and managed to get in two games despite having to flick through the rulebook all the time to answer queries. Next thing to say is that the rulebook could be set out better. It was tricky to find some rules as they weren't where I expected to find them. But these are minor niggles and after a few games you'll have the rules sorted and won't need to refer to the them.

So how did it play? Well the Leadership Points (LP) mechanism worked as well as I thought it would. Having to plan out how to use your LP added a nice tactical extra dimension to the game. Having your LP reduced each time you lose a unit also makes it much harder to work out where you use them as the game progresses. The surprise for me was the effect of the Bravery rolls. Before you can move a unit it has to pass a Bravery test. Situations where a unit had defeated an opponent but taken losses and failed a bravery roll to charge into a fresh unit felt right. We could imagine a unit of knackered warriors saying 'hang on a sec, lets get our breath back first before we go charging off again'.

We did find that the Late Roman cavalry proved decisive in each game. Their speed and manoeuvrability meant they could easily get flank and rear attacks on the infantry which made all the difference. Also melees tended to develop into very messy affairs with units coming in at all angles. Missile attacks could be very effective but we found it difficult to keep the skirmishers alive as what LP we had were needed elsewhere.

The move sequence takes some getting used to (Attackers Skirmishers then Defenders Sk, A's Mounted then D's Mounted, A's Foot then D's Foot) as well as firing coming before moving. This can be a pain for archers as they can't move if they fired, unlike javelin armed troops.

Pros:
Good value
Quick to learn and play
Tactical depth
Interesting game mechanisms
Fun

Cons:
Poorly laid out rules
Limited range of forces (Arthurian Period)

I'm sure we got loads of things wrong in the games we played but these aren't tournament rules and lend themselves to the inclusion of 'house rules'. So when we weren't sure about something we made up a 'rule' and got on with having fun. I'll happily play Dux Bellorum again, hopefully with painted period figures next time, and I have no qualms about recommending the rules to anyone. Buy them play a game or two and have fun after all that's what wargaming is supposed to be about!

Thursday, 2 August 2012

First Game of Muskets & Tomahawks

I had my first game of Muskets & Tomahawks (M & T) on Monday night. For those of you not familiar with it M & T is a skirmish game set in the French & Indian wars period. It's made by the same people who did Saga but apart from the number of figures it uses there's no similarity between the two games.

I used Graham's British while he used his Indians. The game uses a points system to allow you to build your force to suit your style of play. I think we were playing 200pts a side. The terrain layout is shown below.

The terrain layout

We did use missions but not sub-plots (whatever they are). My mission was to scout his two quarters of the table and get back to my baseline. While Graham had to burn down the church and farm on my left.

The basic game mechanics are simple. Each unit has a number that you roll against to hit, kill after a hit or save in melee. Some units have special rules that can modify these numbers as can terrain.

I set up my two British units to cover the church and farm on my left with the intent of holding them. While my Indians were on my right with the aim of using their better speed to do the scouting. Activating units is different in M & T, each unit and each officer has a card which is added to a deck. The deck is shuffled and then the top card is flipped over indicating what unit type and nationality can activate. I had three units and an officer while Graham had four units and an officer.  When a card is flipped all of the units of that type and nationality can activate. This method of activating means that if you have say four units of the same type you could flip their card four times in a row. Meaning that you could activate all matching units four times in a row before your opponent could activate once. Of course the opposite is true and after you have activated you opponent still gets to activate. It's different and makes any kind of tactical planning a bit of a lottery.

Anyway on to the game. I moved my Brits forward into defensive positions to await the enemy while my Indians ran forward. My Indians morale was poor (as was my dice) and they kept falling back from enemy fire, ultimately running away completely. My Brits used their firing skills to inflict lots of hits but couldn't convert them in to kills (again bad dice rolls) also when I did manage a kill Graham's supposedly fragile Indians didn't fall back.

Graham's Indians quickly managed to fire the church while another unit massacred my left flank Brit's in melee. All his Indians then converged on my centre unit who did their best managing to kill a number of Indian's with shooting and in melee. But sadly the enemy's superior numbers and my bad dice rolling told and they were wiped out.

So what did I think of the game? It's interesting, but for me the card based activation makes it too random. I'd play it again but I won't be buying the rules or any figures. Here's some pictures from the game.

My British regulars advance to defend the church

My Indians getting ready to scout

In prepared positions getting ready to blast the heathens.

My Indians encounter two of Graham's units

Graham's bloodthirsty Indians rush forward to engage my British

Gallant defensive volleys do not deter the savages

My troops can only watch as the heathens burn down the
church while using it for cover

The gallant survivors try to hold on

Sunday, 15 July 2012

FoW: Operation Sea Lion - Free for All

I'm posting this Sunday night instead of the usual Monday morning so I can submit this batrep before the Operation Sea Lion deadline ends.

Friday saw my final battle for WWPD's Operation Sea Lion campaign, this one was between my Guards Tank regiment a German Panzer company. We both had 1750 points and my force was as follows:


Gvardeyskiy Tyazhelyy Tankovy Polk (Guards)
Guards Heavy Tank Regiment
Soviet Late-War
Platoon Qty Unit Points
Headquarters
Gvardeyskiy Tyazhelyy Tankovy Polk HQ p.45
1 KV-85 110
Combat Companies
Gvardeyskiy Tyazhelyy Tankovy Company p.46
5 KV-85 555
Gvardeyskiy Tyazhelyy Tankovy Company p.46
5 KV-85 555
Corps Support Companies
Strelkovy Company (Guards) p.26
1
7
Cmd Rifle/MG team
Rifle/MG team
160
Artillery Battalion (Guards) p.138
1
1
1
4
Cmd Rifle team
Staff team
Observer Rifle team
122mm obr 1938 howitzer
170
Air Support p.141
5 Limited Air Support Il-2 Shturmovik 200
Company Points: 1750


While the German forces were as shown below:


Panzerkompanie
Tank Company
German Late-War
Platoon Qty Unit Points
Headquarters
Panzerkompanie HQ p.73
2 Panzer IV H 180
Combat Platoons
Panzer Platoon p.73
5 Panzer IV H 450
Panzer Platoon p.73
4 StuG G 380
Weapons Platoons
Panzer Anti-aircraft Gun Platoon p.75
3 Sd Kfz 7/1 (Quad 2cm) 120
Divisional Support
Gepanzerte Panzergrenadier Platoon p.77
1
4
6
Cmd Panzerfaust SMG team
Sd Kfz 251/1
MG team
230
Rocket Launcher Battery p.169
1
1
1
3
Cmd SMG team
Observer Rifle team
Kubelwagen
15cm NW41
105
Heavy Anti-aircraft Gun Platoon p.171
1
1
2
2
Cmd SMG team
Kfz 15 field car
8.8cm FlaK36 gun (8 crew)
Sd Kfz 7
185
Air Support p.172
3 Sporadic Air Support Ju 87G Stuka 100
Company Points: 1750

The mission was 'Free for All' with the Soviets defending. The terrain layout can be seen below. I put one unit of KV's on each flank with the artilley in the centre and the Strelkovy on my left ready to enter the buldings. The Germans mirrored my deployment with Stugs on their right with the Grenadiers and AA, the Pz IV's were on their left flank. The centre was held by 88's and nebelwerfers plus the HQ.

The view from the German right flank

The view from the German centre

The view from the German leftflank

The view from the Soviet centre

The view from the Soviet right flank

The Germans went first and, thankfully, as the mission used the Meeting Engagement rule they were denied artillery bombardments and air support. They moved up the AA trucks hoping to catch my infantry in the open but had forgotten that they only got the 8" extra range against aircraft so were out of range. The grenadiers moved round their right flank heading towards the ruined buildings. On their left they moved the Pz IV's into firing positions. Everyone else stayed put and shot but could only manage to bail one of my left flank KV's.

My air support arrived but was shot down by combined fire from the 88's and AA trucks. I moved my infantry into the building with the aim of threatening the objective on that flank. I moved up a couple of the far left KV's up to the small wood to get them into cover. Unfortunately my fire was worse than the Germans and I did no damage but I did range in on one of the 88's.

The German right flank at the end of turn 1

The Soviet left flank at the end of turn 1

The German left flank at the end of turn 1

Turn 2 saw the Germans continue to move round my left flank with their half tracks and AA trucks. All their tanks also moved forward to get into short range where possible. Their aim was to Stormtrooper back out after shooting leaving me to shoot at long range. Luckily for me the KV's armour proved too much for the German 75mm guns. But they did manage to pin my infantry with the nebelwerfers. They also got air support and the Stukas dove in on my left flank KV's hitting two but failing the firepower tests. Successful Stormtrooper rolls saw all his tanks pull back to long range except on their left flank.

My air support arrived and again was shot down by German AA. I also failed to unpin my infantry. I was pretty happy with my positions so I stayed put and shot. My right flank KV's managed to knock out one of the PZ IV's and my artillery knocked out one of the 88's.

The Germans continue their outflanking manoeuvre 

The tank duel continues

As it also does on the other flank.

Turn 3 saw the Germans fail in their request for air support. The tanks maintained position to maximise fire. While the grenadiers dismounted and moved forward to get into position to assault my pinned Strelkovy. Fire from the Grenadiers combined with support from the half tracks killed two bases. Things were not looking good for my infantry. But the German 75mm guns again proved ineffective only managing to bail one KV. But the Grenadier assault went in and after some bitter fighting managed to push back the Strelkovy inflicting heavy casualties.

I managed to call in air support again and targeted the pinned 88. I failed to remount my KV and couldn't unpin my Strelkovy. But my right flank KV's knocked out two more Pz IV's forcing a check which they failed. I also managed to knock out one of the Stugs. The Sturmi's dove in on the 88 hit and the 88 failed it's save so now the German left flank was completely open.

The tough armour on the KV's means only one bailed out tank

The German left flank objective is wide open now

The Grenadiers have the beating of the Strelkovy

Turn 4 saw the Germans get their air support and his Stukas targeted my left flank KV's hoping to stop them contesting my left flank objective near the building. His only hope now was to finish off my infantry and hope to claim the objective before I could take his unguarded left flank objective. Worried about more losses he pulled back his stugs into cover except for one which bogged. He also pulled back his HQ tanks hoping to protect his left flank objective. His infantry and AA trucks opened up on my Strelkovy and some excellent dice rolling saw him wipe them all out. His plan to take my left hand objective was working. Sadly for him despite his Stukas hitting two KV's he again failed his firepower rolls.

My air support failed to arrive this turn although I did remount my bailed out tank. My right flank KV's moved up but their progress was hindered by bad going and their slow speed. I repositioned my left flank KV's so that they were better positioned in case his Grenadiers decided to try and assault me to clear the objective. What fire I had did no damage.

The German's pull back


My KV's prepare to be assaulted by the Grenadiers

My right flank KV's look to grab his unguarded objective.

Turn 5 and no air support for the Germans. Their HQ tanks move into cover so they can contest the left flank objective. The AA trucks move forward hoping to get a lucky flank shot on the KV's. While the Grenadiers consolidate to get ready for an assault. His bogged Stug remounts and moves forward hoping for a lucky hit on a KV. But again all the German shells bounce off my armour. The nebelwerfers drop smoke on on of the KV's to protect his Stugs.

I call in my air support and target his CIC near the objective. I double move the right flank KV's, one more turn and the objective will be mine. My CiC's KV shoots at the German 2iC knocking him out. My other fire does nothing but my Sturmi hits, the CiC fails his armour save and I make the firepower roll knocking his Pz IV. At this point the Germans concede. He has nothing close to contest the objective and can't clear out my KV's contesting the other one.

The final positions on my left

The unguarded objective with the knocked out HQ section

An interesting game, the Pz IV's and Stugs were no match for my KV's and the 88's proved to be much less of a threat than I thought. But those grenadiers were nasty with all their machine guns. So my final battle for Operation Sea Lion and a win for the Allies 5-2. Lets just hope we've hung on to London.

You may also like:

Related Posts Plugin for WordPress, Blogger...