Showing posts with label review. Show all posts

Sunday, 13 December 2015

Iron Cross WW2 rules first playthrough

As promised here's my thoughts on the rules after my first solo play through. I set up a 4'x4' table as shown below, the hedges I used as bocage. (Sorry about the poor quality of the pictures I couldn't find the lead to charge my camera.)

A crossroads somewhere in Normandy

I grabbed what 15mm figures I could find and made two 500pt forces. The Americans (shown below) had 3 Sherman 76mm, 2 M10 tank destroyers, an M20 scout car, a mortar, an MMG and 6 infantry units 3 of which had bazookas.

The U.S. forces

The Germans (below) had 2 Panthers, a Pz IV, a Stug IV, 2 Pak 40s, a nebelwerfer used as a mortar and 4 infantry squads.

The German force

I'm not going to do a full AAR as that wasn't the point of the exercise. My aim was to try out the rules and see what happened.

I didn't use any of the supplied scenarios but set up was straightforward. The game uses activation tokens as its main resource, activating a unit to move or react to an enemy move costs you one token. You start the game with one token for each unit plus one extra from your command unit. In this game the US had 15 tokens while the Germans had 12 tokens. I was a bit worried that this activating and reactivating wouldn't work too well solo but I was wrong. The US won the initiative and after I'd activated a few units I was starting to look at how many tokens I had left and how many the Germans still had and decided to pass the initiative over to the Germans while I had enough tokens left to react if needed. Also this allowed the US to see what the Germans were going to do and maybe adjust their plan accordingly when they got the initiative back. This planning your tactics and deciding when to react and when to pass the initiative over is the main part of the game and is great fun even solo.

In the Meeples & Miniatures podcast the authors commented that taking a force just comprised of a few Tigers or Panthers although it seems powerful is a bad idea. I wasn't so sure about this and nearly took five Panthers (100pts each) as the German force. However after a few activations I understood what they meant. Obviously as you activate and reactivate models you have fewer & fewer tokens left. The US with 15 tokens could do a lot of things but if I'd taken all Panthers I'd only have had 6 tokens to start with and would soon run out meaning the US could activate without fear as the Germans would be unable to react allowing the tank destroyers or Shermans to push forward and go for shots on the flank/rear unopposed. But that's not the only reason. If you have enemy infantry within 12" you're penalised when firing (maybe because your commander is buttoned up reducing visibility), unless you have your own infantry within 12" as well. So you need infantry support for your tanks which I thought was a nice touch.

I'd didn't find the lack of artillery a problem as I had mortars for indirect fire. Also one of the scenarios allows a preliminary bombardment which inflicts morale markers to weaken the enemy before your attack. I didn't miss air support either, obviously the airfields were shrouded in fog or the planes were tasked elsewhere. I didn't use smoke as I never really felt the need for it as I had plenty of cover on the table.

(What follows is mainly what I felt was wrong with the rules. This doesn't mean I don't like the rules or that they're bad. Quite the opposite I think they're excellent but with some problems that should have come up in play testing and been fixed. It looks like when they were streamlining the rules they went a little too far in places. None of the problems I encountered were game breaking or even difficult to fix. But may cause problems for inexperienced gamers.)

I did start to hit problems as the game progressed. The first was with line of sight. There is no mention of how you deal with LoS anywhere in the rules. Now in most cases this isn't a problem as you can reasonably say that units behind buildings or bocage are obviously out of sight. But then we get to woods, do they allow clear LoS as you can see through them on the table or do they block LoS completely. If you have a unit in a wood can it shoot out and be shot at in return? None of these things are that difficult for a pair of friends who are experienced gamers to agree on before the game. But these rules with their simplified approach while still having good tactical depth would be an excellent starter set for new players and I think they would struggle to know what to do. This isn't a big fix, a few lines could quickly clear this up and I'm surprised it hasn't been included.

My next problem follows on from this and relates to buildings. There are no rules for buildings in the game. A few activations in I wanted a few units of infantry to enter the church but I couldn't find how you do this. After a bit of thought I decided that taking an action to enter a building (units have two actions they can use each activation) would be reasonable. After the game as I was checking a few things in the rulebook I noticed that buildings were mentioned in the movement section as being counted as rough going, that is the same as a hedge or area of rubble.
Looking at how rough ground affects movement I saw that it has no effect on infantry. Fair enough the game is a bit abstracted in certain areas and I can live with that. Except looking at how rough ground affects vehicles the rule doesn't work. For example scout cars can pass through rough ground if they roll a 2 or better on a D6. I'm sorry there's no way a little scout car can enter one side of a terraced house and easily pass out the other side. An intact house is very different from a hedge or area of rubble. Again this is a reasonably easy fix and one wonders why it wasn't picked up in playtesting.

But that's not the only problem with buildings and here we go back to the lack of LoS rules. Lets say my US infantry enter the rear of the church and I have a Pz IV in the field on the other side of the church. Can the Pz IV react to the infantry moving into the church and shoot them, does it see them? Yet again this is an easy fix and I can't see how this didn't come up in playtesting.

The last problem I have with the rules is how certain things are explained. I'll give you a couple of examples.

One of the rules for mortars says that you get a +1 bonus to hit as long as some part of the target hasn't moved more than 4" from where it was first targeted. This seems straightforward, it's 8+ to hit the first time and as long as part of the target is within 4" of it's original position the next time that turn you shoot at it it's a 7+ and then a 6+ etc. Except the rule goes on to explain this by saying "This means that a player cannot activate the target unit, shuffle sideways 5" and then claim its not in the target area." Now I'm not very good at maths but I think that 5" is more than 4" so it is outside the target area. This could be a typo but it might not be, it might mean something else that I'm missing.

Another example is with Reactivation. The rule says the reacting player has to say what his reaction is and pay the token cost 'before any dice have been rolled'. So what happens if the first player then fails his activation, does the reacting player still lose his token for reacting even though he has nothing now to react to. I decided that if the player fails his roll the activation didn't happen so there is nothing to react too. This maybe what was intended I have no idea.

There's other areas where things aren't as clear as they could be but these rules aren't alone in that respect.

The only other thing I would say is that these are not 'fast play' rules. Both of you will spend ages each turn deciding on what to activate and whether to react or not. Especially with games where you may have 30 or 40 tokens each like at 1000pts. You could get round this by setting a time limit for each turn and using a chess clock app on your mobile.

Overall I like the rules despite the problems I mentioned. I spent most of my time during the game working out which units to activate and whether it was worth spending a token to react to a move or not. Should I risk it and try push forward multiple times with a unit and hope I made the activation rolls and not waste limited tokens or not. In other words I was thinking about tactics not rules which is the overriding strong point for these rules. I'll be using them again now I've got my 'house rules' sorted for the things I mentioned and I expect to have lots of fun doing so.

Thursday, 10 December 2015

Quick Review: Iron Cross WW2 Rules

Time for another quick review. This one features the new WW2 wargame rules 'Iron Cross' from Great Escape Games which cost £12 inc p&p. So onto the rules (here I should say that I just received my copy today so haven't had time to play an actual game.) I have now had a play through of the rules and the post can be found here.


I'd seen mention of these rules on TMP but didn't know anything about them until I listened to the Meeples & Miniatures podcast 156 which featured an in-depth interview with the rules creators.I had no real interest in a new set of WW2 rules as I felt I was pretty well catered for with Chain of Command and Battlegroup: Fall of the Reich. However listening to the podcast got me interested in them and I ended up buying a copy. What got my interest was a combination of the 'simple' mechanics/approach and the tactical depth to the gameplay.

The rules fast play approach is something that I've found more appealing lately. I've been playing a lot of Kings of War Napoleonics (a home brewed variant) and a set of rules that you can quickly explain to a new player that has them thinking about tactics rather than mechanics after a couple of turns has become more and more appealing. This is what led to buy the rules after listening to the podcast.

Some of the stuff in the rules is fairly standard, for example the rules use a D6 for morale/activation and a D10 for combat and markers to manage activations. But what is unusual is that there are no weapon ranges. If you can see it you can shoot it. Also there is no separate melee phase. At 6" range and under firing is more deadly and the close combat/grenades etc is assumed to be part of the combat at that range. This may make the rules seem too simple but they're not. The big thing that sold me was the tactical depth presented by the activation system.

You get one activation marker for each unit you have plus two from the commander and these are used to activate your units, again fairly standard stuff. Where the fun happens is how you use these markers. The player with initiative activates one unit with a marker. He can then decided if he wants to activate another unit or activate the same unit again. If the same unit is activated again he must roll a D6 and get one more than the number of activations that the unit has undertaken e.g. activating a 2nd time he needs a 2+ on a D6. But wait, there's more. His opponent can interrupt the activation and spend one of his markers to activate a unit to react to the move (for example to shoot with an anti-tank gun) but needs a 3+ on a D6 to activate the unit. So your opponent can react to your moves by spending his activation markers but the more markers he spends in reacting the less he will have for his own turn. Plus the player with initiative can at anytime pass the initiative over to his opponent who can pass it back after he has completed at least one activation. So you have a cat & mouse game with resource management. Do you risk spending a marker on reacting or do you save it, if you spent one on reacting with your anti-tank gun but it misses do you spend another or cut your losses. Do you spend markers on the same unit and push ahead to grab an objective or will it get isolated and cut down in your opponents turn. Maybe you've planned ahead and saved some markers to react and protect your advanced unit.

Although it's a bit of a hackneyed cliche the game is like chess in that the basic rules are simple but the tactical gameplay is complex. The rules only cover 11 pages of the 32 page rulebook. The rest is taken up by the four scenarios and the four late war army lists (which cover a page each) and some gameplay examples. Units are 4/5 individual figures to a unit for 28mm or 4/5 figures on a base for 15mm, tanks are based individually, support weapons have 2/3 crew per base so you can easily reuse your existing stuff without rebasing.

Other stuff to cover, a hit inflicts a morale marker on a unit (think pins from Bolt Action) infantry can have 5 markers before they are removed from play. You can spend an activation marker to try and rally a unit and remove some morale markers. Individual figures can have any weapons you like as they are not taken into account. Firing is done with a D10 and a 5+ hits modified by moving, number of morale markers etc and that's about it.

If you want some more details then I suggest you listen to the podcast I mentioned above. I'm really looking forward to giving these rules a try. Now all I have to do find which box my WW2 stuff is in, moving house really messes up your storage system. Once I've had a game I'll post an AAR and link it here.

Saturday, 7 December 2013

Quick Review: Deadzone Plague Troopers & Specialist

Today's random pick is two Troopers and a Specialist for the Plague faction. All the minis come packed as shown below with no indication of what the models are or any instructions of how the pieces go together.

 
All the parts have different shaped lugs and sockets even the small heads so it's obvious which part goes with which figure. This is the worst set I've had for mould lines and flash which will be obvious from a look at the photos below.

 
Even with some cleaning up I can see from the photos that's there's lots of bits I've missed. I'm also disappointed with the sculpting of the weapons. They lack detail and look too 'toy soldierish' for my tastes. Maybe they'll look better painted up.

 
On the plus side the models all went together very easily and the sculpts look great. I'm finding it hard to choose between Plague and Marauders as my favourite faction. As usual a Mantic ghoul is added as a size comparison.


Too many mould lines for my taste but still my favourite pack of minis so far.

Tune in tomorrow for another random pick from the box. Hopefully with no more badly fitting pieces.

Friday, 6 December 2013

Quick Review: Deadzone Marauder Pyro

Today's random pick is the Pyro for the Marauders faction. All the minis come packed as shown below with no indication of what the models are or any instructions of how the pieces go together.

 
As there's only one mini in the pack there's no confusion about which parts go with which model. All the parts have different shaped lugs and sockets so it's obvious which part goes where.

 
There are minimal mould lines in only a couple of places but there is a bit of flash on a couple of the parts on the sprue. The parts cleaned up okay, just be careful trimming the lugs on the arms.

 
I dry fitted all the pieces individually and they went in with no problems. However as you can see in the photo below once assembled there's a big problem where the left arm should join the flamethrower. As the position of the arms is fixed by the lugs and sockets they're obviously in the right place so I tried trimming off some of the plastic on the weapon where it meets the chest but it made no difference. In the end I filled the gap with green stuff. Whether this is a one-off, some mistake I made or a design flaw we'll have to see once others build their Pyros.

 
Nice figure, I especially like the tank on his back. Gap aside I'm looking forward to painting this up. As usual a Mantic ghoul is added as a size comparison.


Tune in tomorrow for another random pick from the box. Hopefully with no more badly fitting pieces.

Thursday, 5 December 2013

Quick Review: More Deadzone Marauders

Today's random pick are different Trooper and Goblin Sniper sculpts for the Marauders faction. All the minis come packed as shown below with no indication of what the models are or any instructions of how the pieces go together.

 
With the size difference between the two models there is no problem working out which part goes with which model. The sprue contains heads for both models, a backpack for the sniper and a knife for the Trooper.

 
There was a bit of flash on the weapons but hardly any mould lines on these models. Everything went together easily except for the Troopers right arm where the lug needed some trimming to get a good fit. The only other issue was with the sniper rifle which was bent but that was easy to fix.

 
Here's the assembled models, as usual a Mantic ghoul is added as a size comparison.


For Orcs these Marauders look a lot like gorillas, not that that's a bad thing. In fact space gorillas would be a cool faction.
 
Tune in tomorrow for another random pick from the box.

Wednesday, 4 December 2013

Quick Review: Deadzone Rebs Faction minis

Today's random pick is two Human troopers and a Yndij Sergeant for the Rebs faction. All the minis come packed as shown below with no indication of what the models are or any instructions of how the pieces go together.

 
All the pieces for these models have different shaped lugs and sockets so it's obvious which part goes with which model. The sprue remnants were easy to trim off except for the backpack which being so small made it tricky. Watch your fingers! There was some flash on these models, particularly on the weapons and some minimal mould lines were visible in a few places.

 
Assembly was straightforward after a bit of dry fitting to make sure parts were the right way round, particularly with the tail. Nice enough figures but nothing special. Although the billowing coat is a nice touch. As usual a Mantic ghoul is added as a size comparison.


If I decide to sell any of my strike teams it will probably be the Rebs. Nice enough figures but nothing that grabs me.

Tune in tomorrow for another random pick from the box.

Tuesday, 3 December 2013

Quick Review: Deadzone Plague Stage 3A

Today's random pick is a couple of Plague Stage 3A for the Plague faction. The models are the General and a Trooper. All the minis come packed as shown below with no indication of what the models are or any instructions of how the pieces go together.

 
All the pieces for these two models have different shaped lugs and sockets so it's obvious which part goes with which model. The sprue remnants were easy to trim off except for on the heads which being so small made it tricky. Watch your fingers! There was no flash on these models but there were minimal mould lines visible in a few places.

 
Assembly was a doddle and the final models look really nice although the detail on the rifles is a bit meh. As usual a Mantic ghoul is added as a size comparison.
 
Stage 3A 'General'


Stage 3A trooper


I like the poses on these models and look forward to assembling more Plague. It looks like Marauders and Plague will be my factions of choice.

Tune in tomorrow for another random pick from the box.

Monday, 2 December 2013

Quick Review: Deadzone Marauder Commando

Today's random pick is a Commando trooper for the Marauders faction. All the minis come packed as shown below with no indication of what the models are or any instructions of how the pieces go together.

 
This is a four piece model with shaped lugs on the various parts so everything is easy to fit together. The sprue remnants were easy clean up but there were very visible mould lines on all parts of this model. Of the eight models I've assembled so far this is the first one with bad mould lines so we'll have to see if this is a one-off or not.
 
I think these models may be made with something called restic which I gather is sort of a plastic/resin combination. The detail seems fine but cleaning up the mould lines seemed trickier than on plastic models I've made before. You seem to have a white line left where the mould line had been so you're not sure if you've removed everything. We'll have to see how well I've done once it get painted up.

 
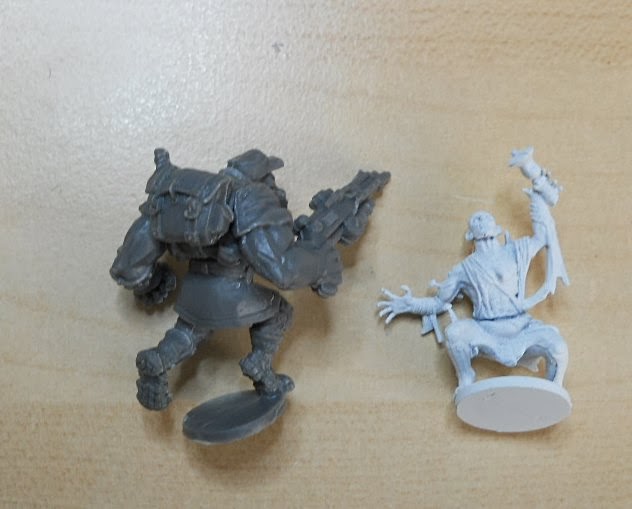
The finished model is quite nice with lots of detail like treads on the sole of the boots so should look good when painted up. As usual a Mantic ghoul is added as a size comparison.


Sunday, 1 December 2013

Quick Review: Deadzone random MVP

Today's random pick is the random MVP for Dreadball that's included with your Kickstarter as a bonus figure. I gather this one is called Riller. All the minis come packed as shown below with no indication of what the models are or any instructions of how the pieces go together.

 
There's only three parts to this model and the sprue remnants were easy to trim off.

 
So assembly was a doddle. But I must say I'm totally underwhelmed by the model. Its tiny and appears to be in a rather weird position. How they can normally charge £4.99 for what is basically a single 20mm plastic figure is beyond me. No wonder they have a load of these in the warehouse to throw in with the Kickstarter packs.


Hopefully tomorrows random pick will be more inspiring.

Saturday, 30 November 2013

Quick Review: Deadzone Marauder Ripper Suits

Today's random pick is two Ripper Suits and a Goblin sniper for the Marauders faction. All the minis come packed as shown below with no indication of what the models are or any instructions of how the pieces go together.

 
Here's all the pieces from the pack. Again hardly any visible mould lines but I did find a little bit of flash on the legs of the Ripper Suit models but it's not very noticeable.

 
Here's all the parts allocated to the various models. Again with no instructions it was hard to work out what went with what as there seemed to be spare pieces. So I found the models in the rulebook but couldn't find a clear shot of the close combat Ripper. The close combat Ripper has two saws and looking at the model it was obvious you could only fit one of them. So I was worried that picking one of them one would affect its points cost or combat ability. I had a flick through the rulebook and couldn't find anything about points or weapon choice affecting combat so I decided to have a look at the cards for this faction.
 
Each faction has it's own card deck. This deck has three types of card Mission cards, Battle cards and Stat cards. As you'd expect the mission cards tell you what you need to do to win but they also give you deployment zones. The Battle cards are used during the game and do things like giving you an a bonus in combat etc. The Stat cards though not only give you the stats for the model with their weapons but also have a picture of the model. I'll do a fuller look at the cards and rules once I've assembling the figures.
 
So looking at the stat card for the close combat ripper suit I can see that it doesn't matter which Saw I use as it's just cosmetic.

 
So on to the assembly of the models. The first thing to say is clear your work area of everything except the bits you need for that particular model as it's easy to pick up the wrong part by mistake. I was assembling parts for both models while the glue dried on one part and ended up gluing the wrong arm/weapon combo. Luckily I spotted the mistake before the glue set. Next thing is that the parts don't fit together well. I had to trim some pieces and even then there wasn't a perfect flush fit. I'm not saying the finished model looks bad, in fact I love how they look, just that you need to be aware that you'll have to do some prep work to improve the fit.

 
Dry fit all the pieces so you know where everything goes. This is particularly true for the chain gun as the ammo belt needs to be positioned correctly to make it line up well.

 
There are  alternate parts like the chainsaws and heads plus there are flavour pieces like the mini radar dish you can add to add to customise the finished model. One part that had me confused was the one shown above the goblin in the photo below. The close combat ripper has a hydraulic ram on his left arm and I worked out later that it was an alternate part that showed the ram retracted.
 
The last model in the pack is the Goblin Sniper. Easy to assemble as you just have to glue the head into place. However on my model the gun barrel was slightly bent but that's an easy fix.

 
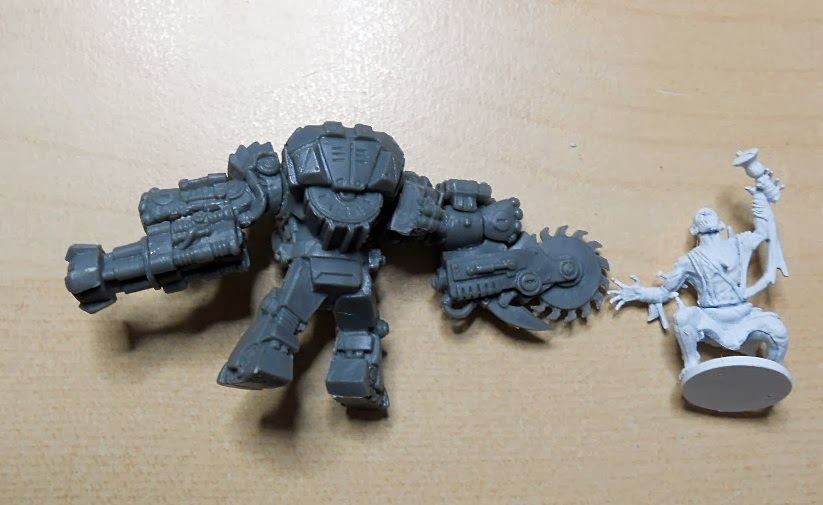
The finished models with a Mantic ghoul for size comparison. Also included in the box are some 40mm bases to mount these on.


The pictures don't really give you a true impression of the size of the finished models. These Ripper Suits look massive, bristling with all kinds of weapons. I was going to go with Plague as my main faction but after building these I'm going Marauder all the way.
 
Tune in tomorrow for the next random pack.

You may also like:

Related Posts Plugin for WordPress, Blogger...